How to Protect a Branch to Accept Pull Requests From Just a Single Branch in Azure DevOps
Perhaps you’re familiar with this:
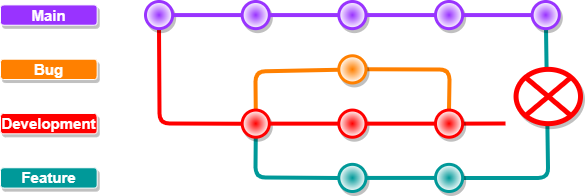
You’re working in Azure DevOps and next to your main branch, you’ve configured a development branch to do most of your work in.
You’ve configured branch policies on both of these branches so that they require a Pull Request to accept changes, they can’t be changed by direct commits.
Now you’re all done creating your new feature in your feature branch and you create a Pull Request to merge these changes into development so they get tested before you push it into main.
But on the Pull Request ‘wizard’, you forget to check where you’re merging into and presto chango, your PR goes from your feature branch straight into main. 😢😭
Of course, branch policies can also be configured to enable reviewers to make sure others check your work, but unfortunately this can still be overlooked.
In comes todays solution: create a validation check to make sure only Pull Requests from development can be merged into main and nothing else.
Set up build validation
In order to solve our problem, we’ll:
- Make a build pipeline in Azure DevOps to do a simple check on the source branch if it matches an approved branch
- Set up a branch policy Build Validation to deny the Pull Request if the build pipeline fails
Create your Build Pipeline
The build pipeline yaml code is fairly straight forward:
trigger: none

pool:
  vmImage: ubuntu-latest

steps:
- task: PowerShell@2
  inputs:
    targetType: 'inline'
    script: |
      $acceptedBranch = 'refs/heads/development'
      $sourceBranch = "$(System.PullRequest.SourceBranch)"

      if($sourceBranch -ne $acceptedBranch)
      {
        "PR to 'main' only allowed from $acceptedBranch"
        "PR to 'main' attempted from $sourceBranch"
        exit 1
      }
    failOnStderr: true
Let’s break it down:
trigger- We don’t want it to be triggered on anything but a Pull Request.
We will arrange that through a Branch Policy setting later.pool: vmimage- Pick whatever image you want here, as long as it supports PowerShell.steps- We will use an inline PowerShell script ( we can also use a scriptfile, but it’s too simple in my eyes to justify that).script- Here’s the actual logic:$acceptedBranch- provide the full name of the branch that IS allowed to open a Pull Request tomain.
This normally includesrefs/heads/as shown above.$sourceBranch- Use the system defined variable to find out which branch is used as source for the Pull Request.if-loop- In case the sourcebranch is NOTdevelopment, provide some verbose information on what went wrong and exit the script with exitcode 1 (error)
failOnStderr- In case the script exits with any code other than 0, it will report as failed, blocking the Pull Request.
So how to we create the pipeline?
- In Azure DevOps, go to the
Pipelinestab. - Select the
Pipelinesoption. - Click the
New pipelinebutton.

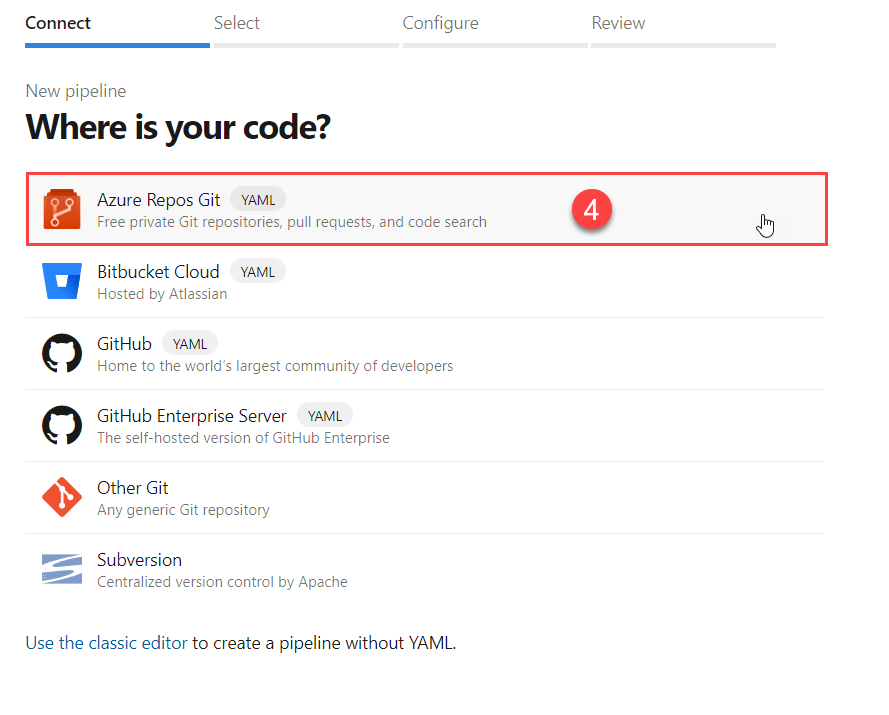
- Our code resides in Azure Repos Git, so we select this.
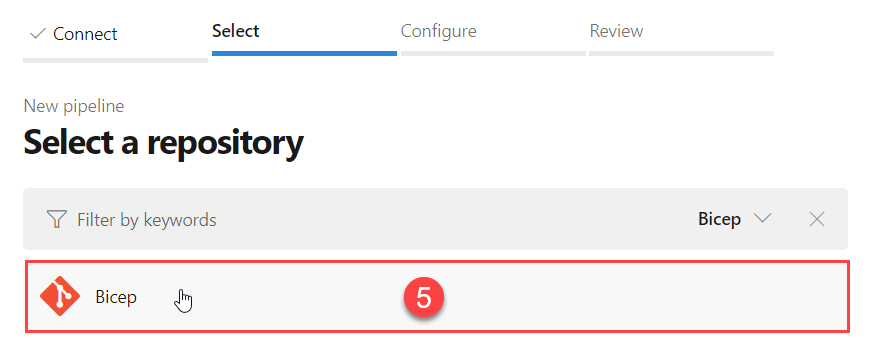
- Select the actual repository in which your code resides (in my case the
Biceprepo).
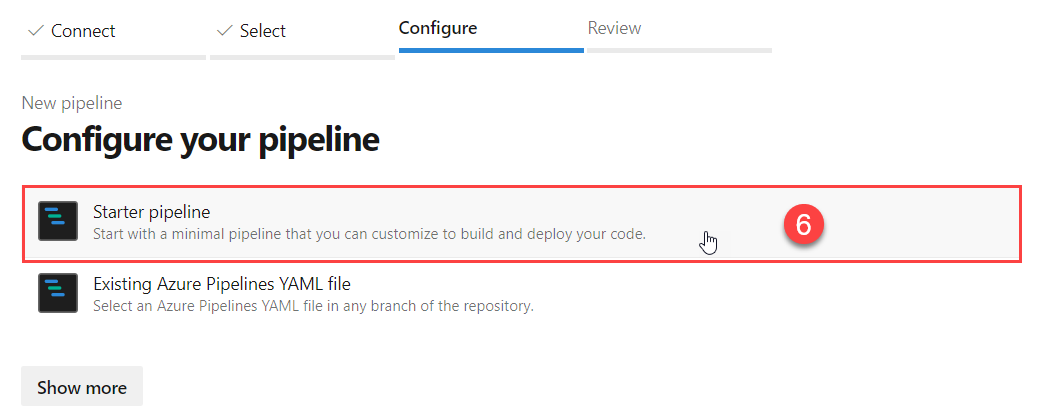
- Configure a new Starter pipeline by clicking this option.
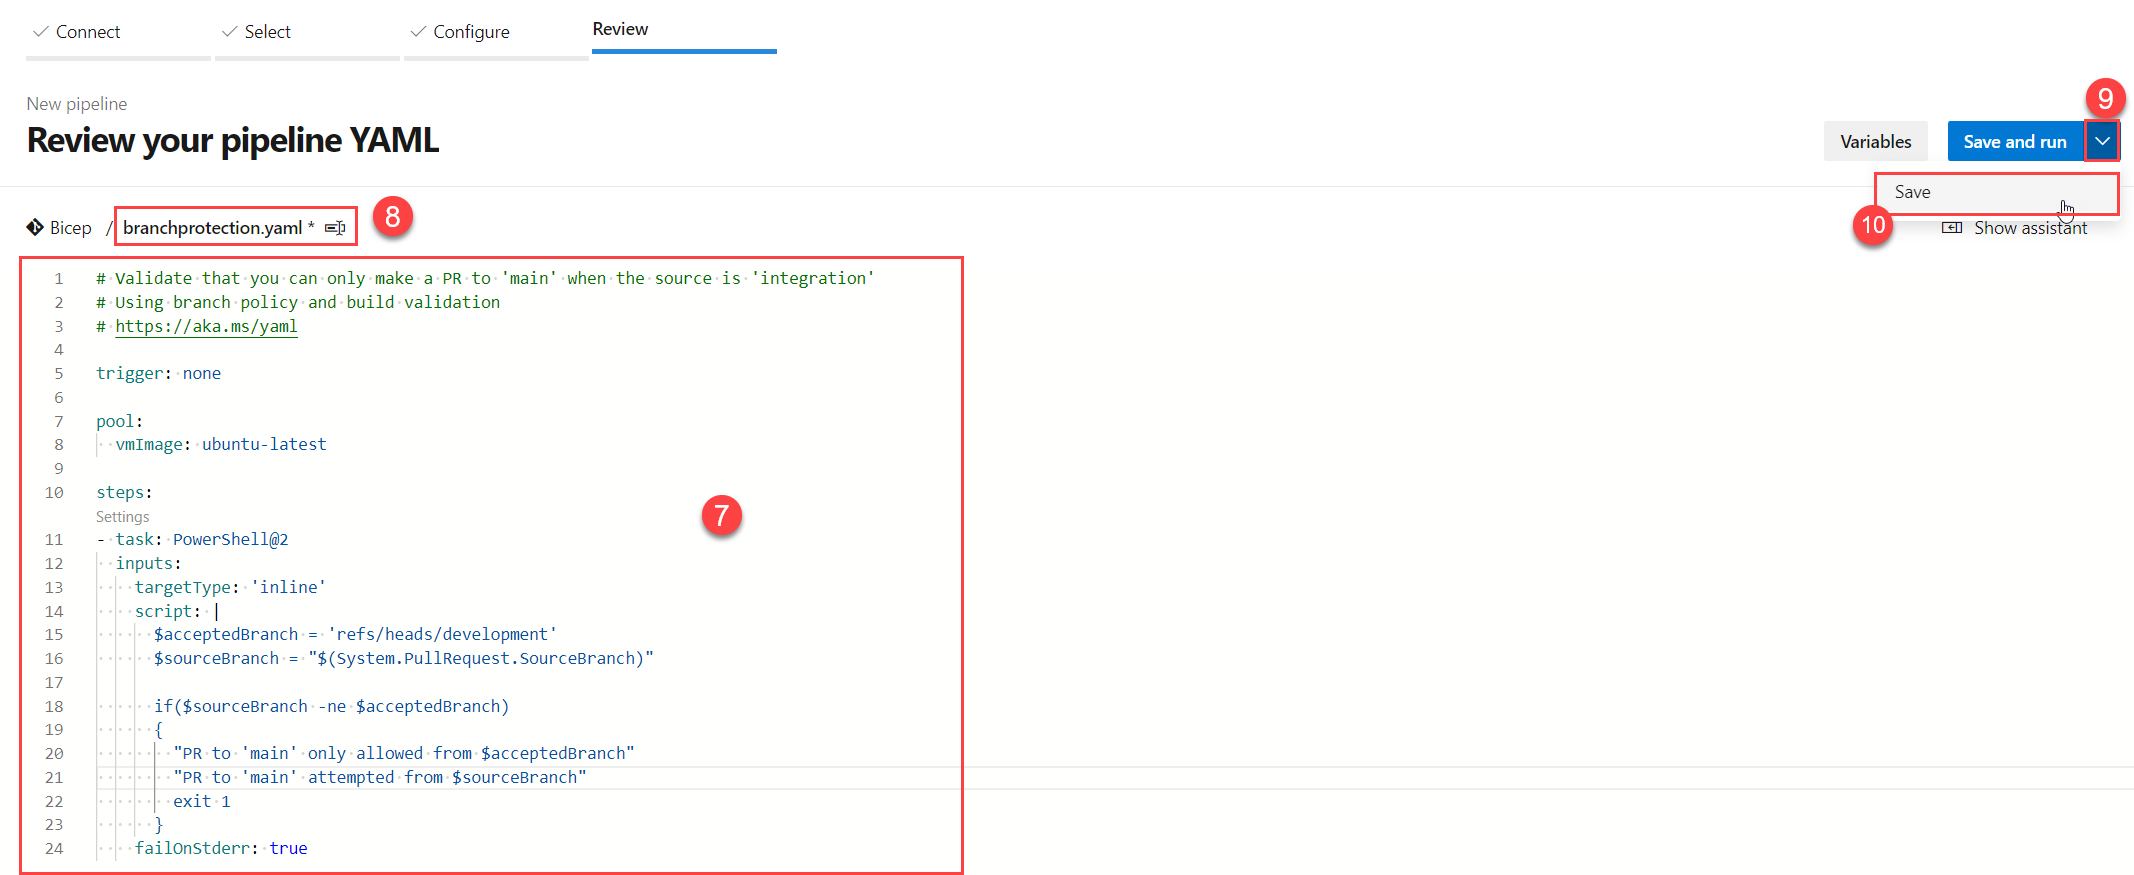
- Paste the yaml code as defined above (of course adapting it to your own needs/requirements) into the code field.
- Click the filename to rename it to something you might recognize/remember.
The file will be saved in the root of your chosen repository by default. - Don’t click on the
Save and runbutton, but the dropdown option right next to it. - Now click on the Save button.
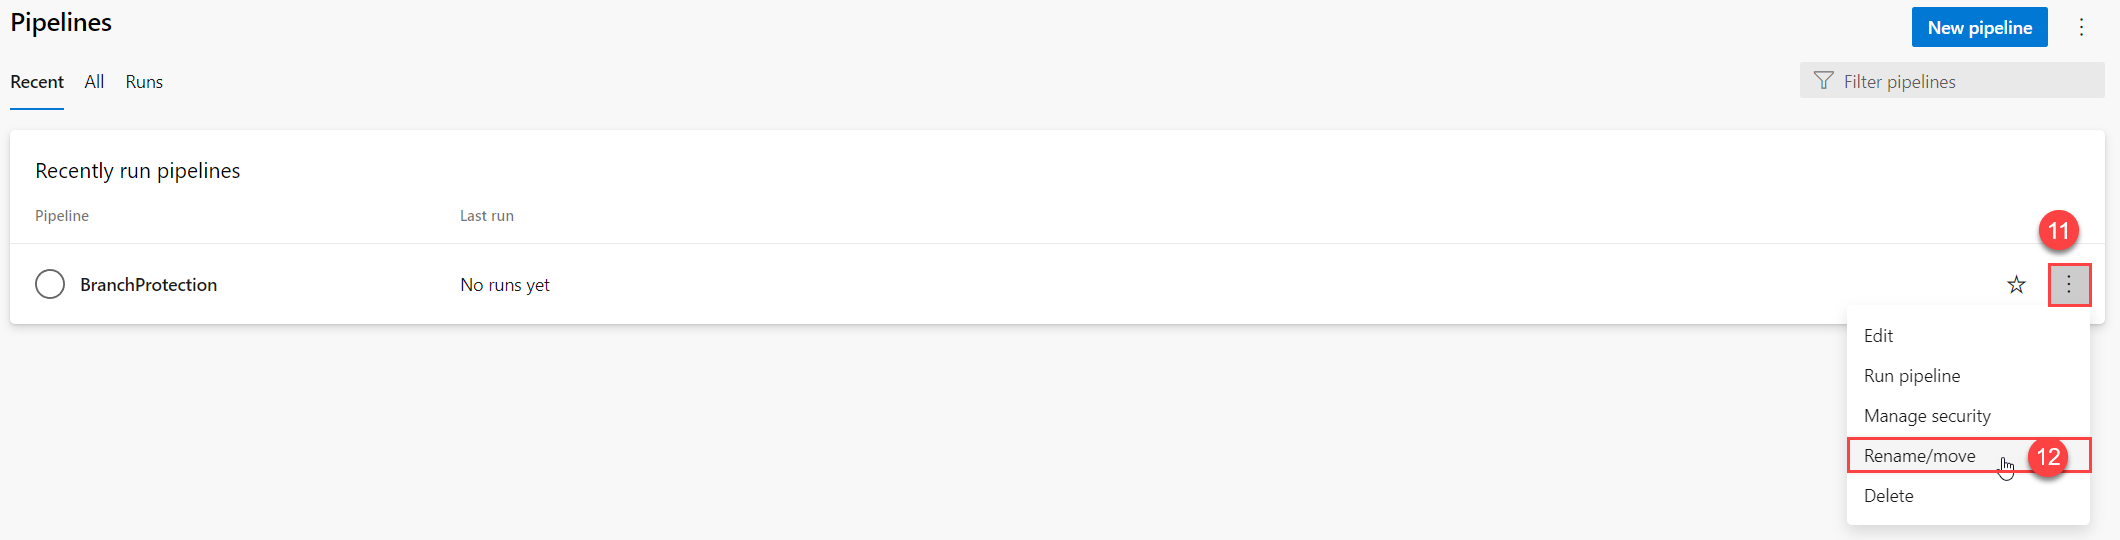
- Select your build pipeline and click the context menu.
- Click
Rename/moveto rename the DisplayName of your Build Pipeline.
The pipeline section is now ready to be used.
Configure yourBranch Policy
To make use of the newly created Build Pipeline, we need to configure it in a Branch Policy.
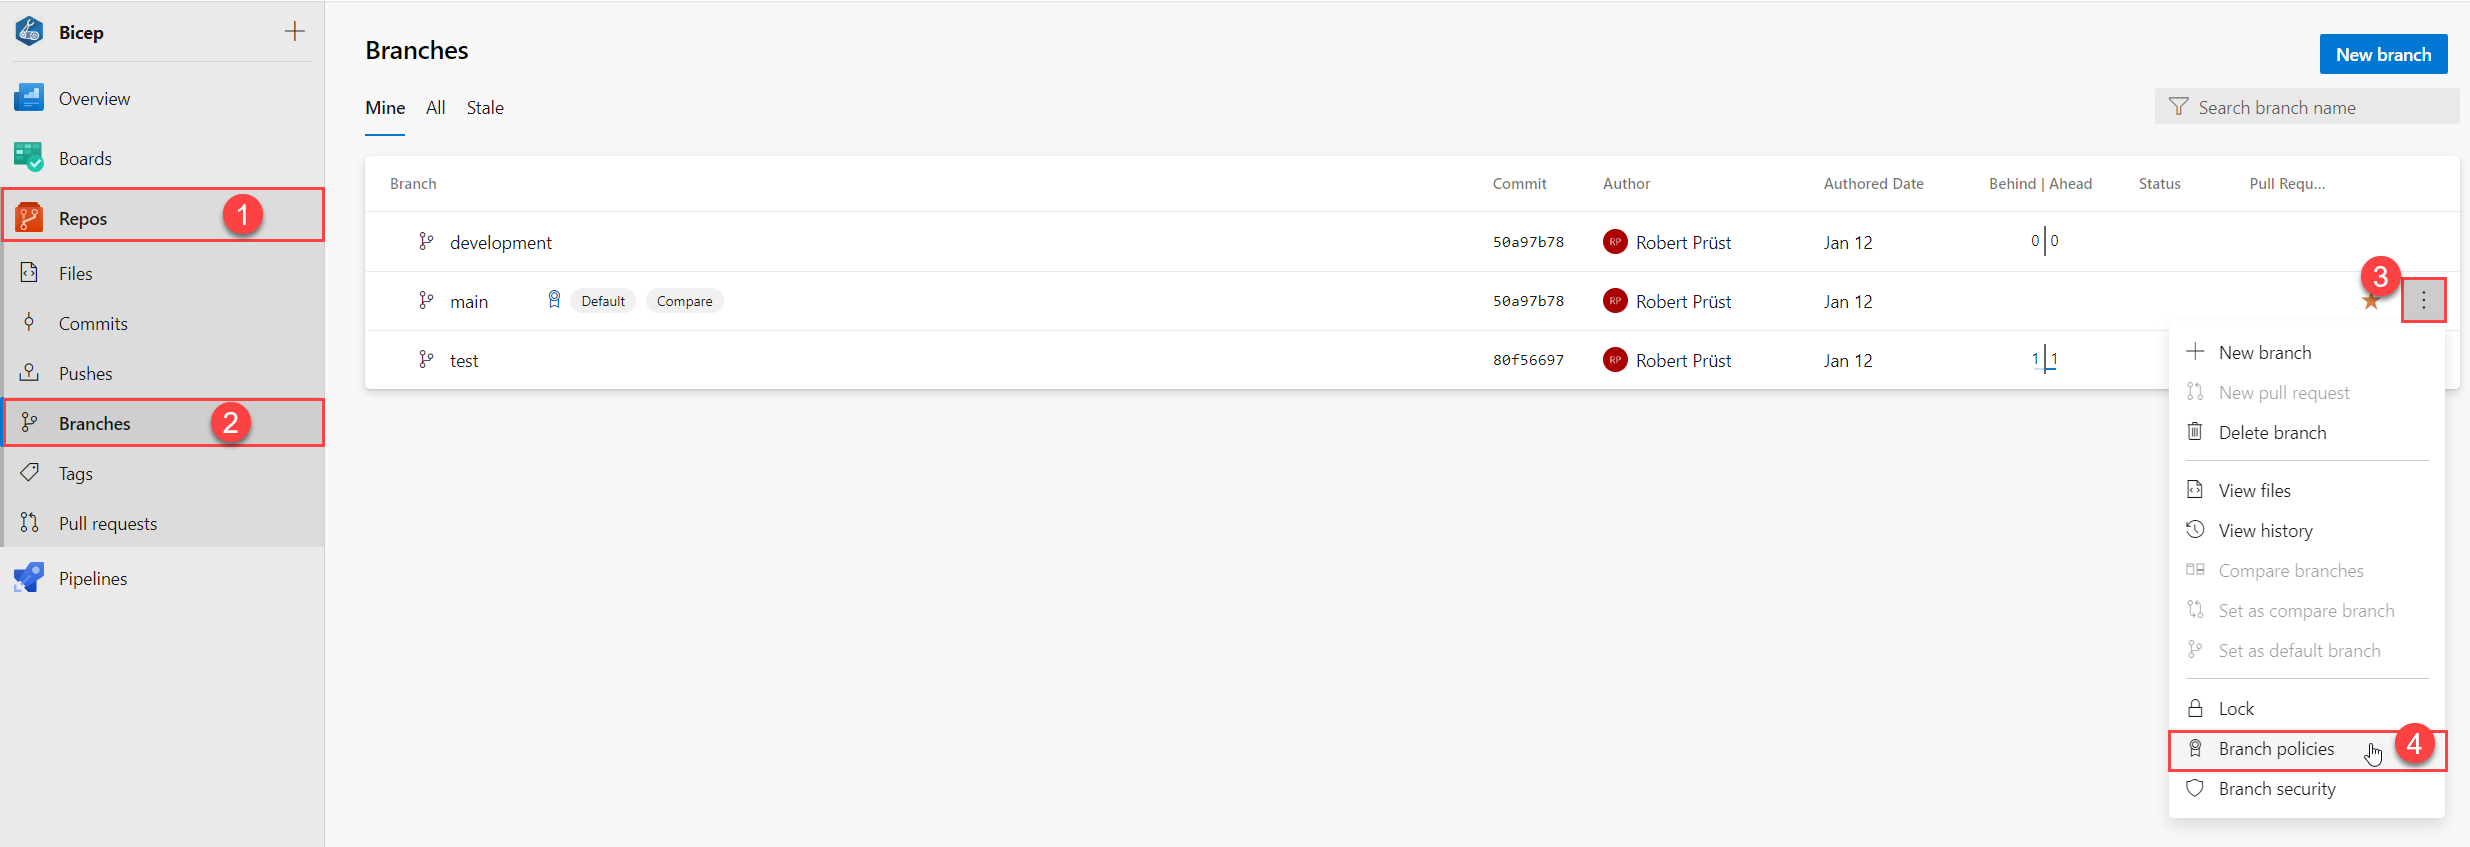
- In Azure DevOps, go to the
Repostab. - Select the
Branchesoption. - Select the context menu for the branch you want to ‘secure’.
- Select the
Branch policiesoption.
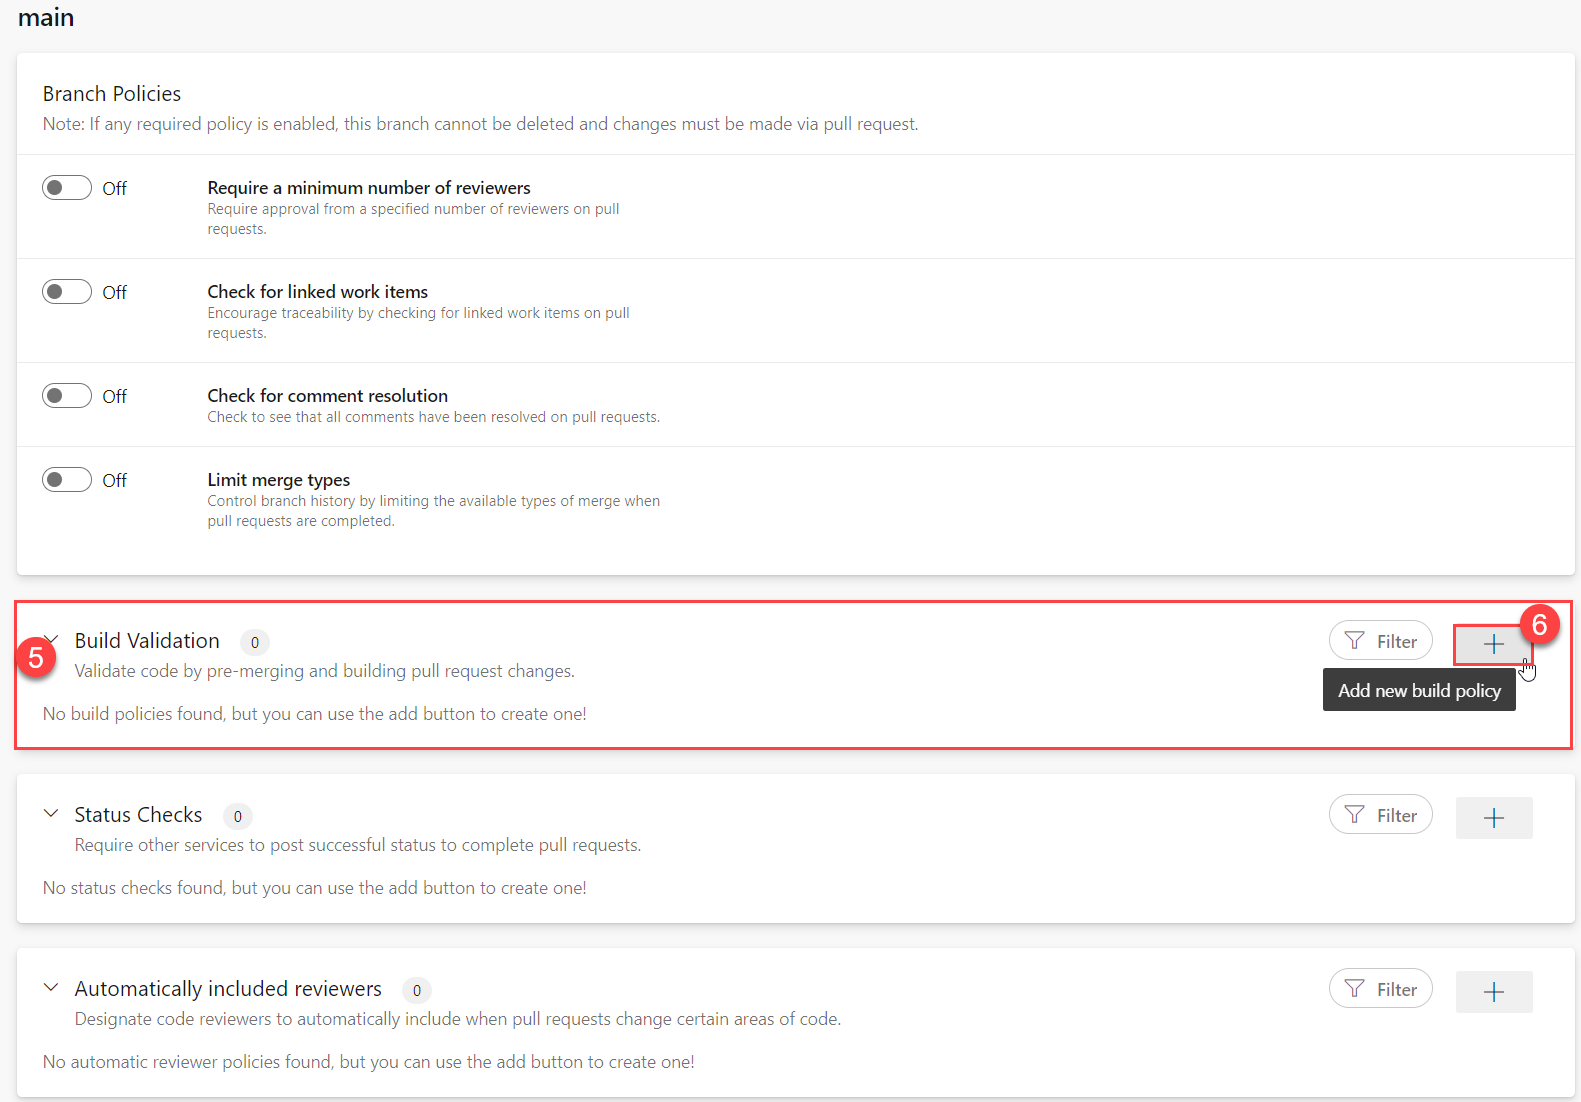
- Go to the
Build Validationsection. - Click on the
+symbol to add a new build policy.
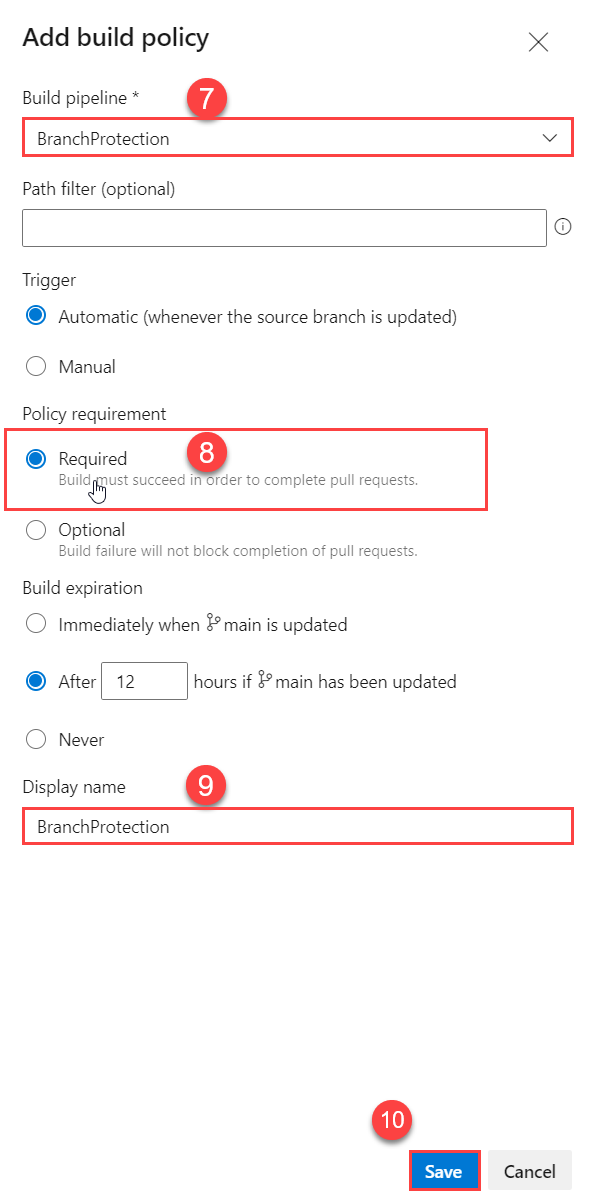
- Select the
BranchProtectionBuild Pipeline we’ve created earlier. - Make sure the
Policy requirementis set toRequiredfor obvious reasons. - Give the Build policy a simple and recognizable
Display name. Saveyour Build policy.
Test your work
Ok, we’ve now set up our Build pipeline and Branch policy and everything should work as intended… but does it really?
Give it a run for its money and edit/commit a file in a branch other than main or development and create a Pull Request directly into main to see how this works:
In this example I’ve created a Pull Request directly from test into main.
When looking at the Overview, you can see that it’s Queueing up a Build pipeline called BranchProtection.
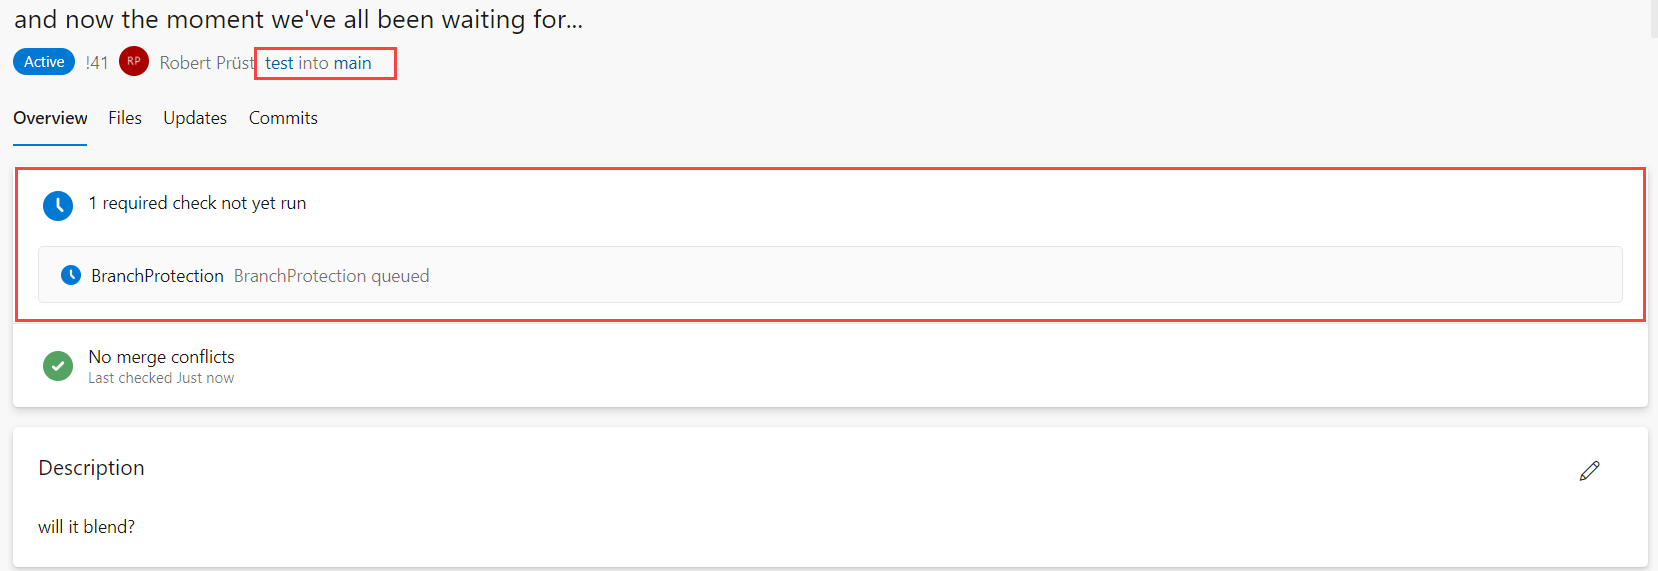
Low and behold, the pipeline should fail, because we’re not creating a Pull Request from development, here’s how to find out what went wrong
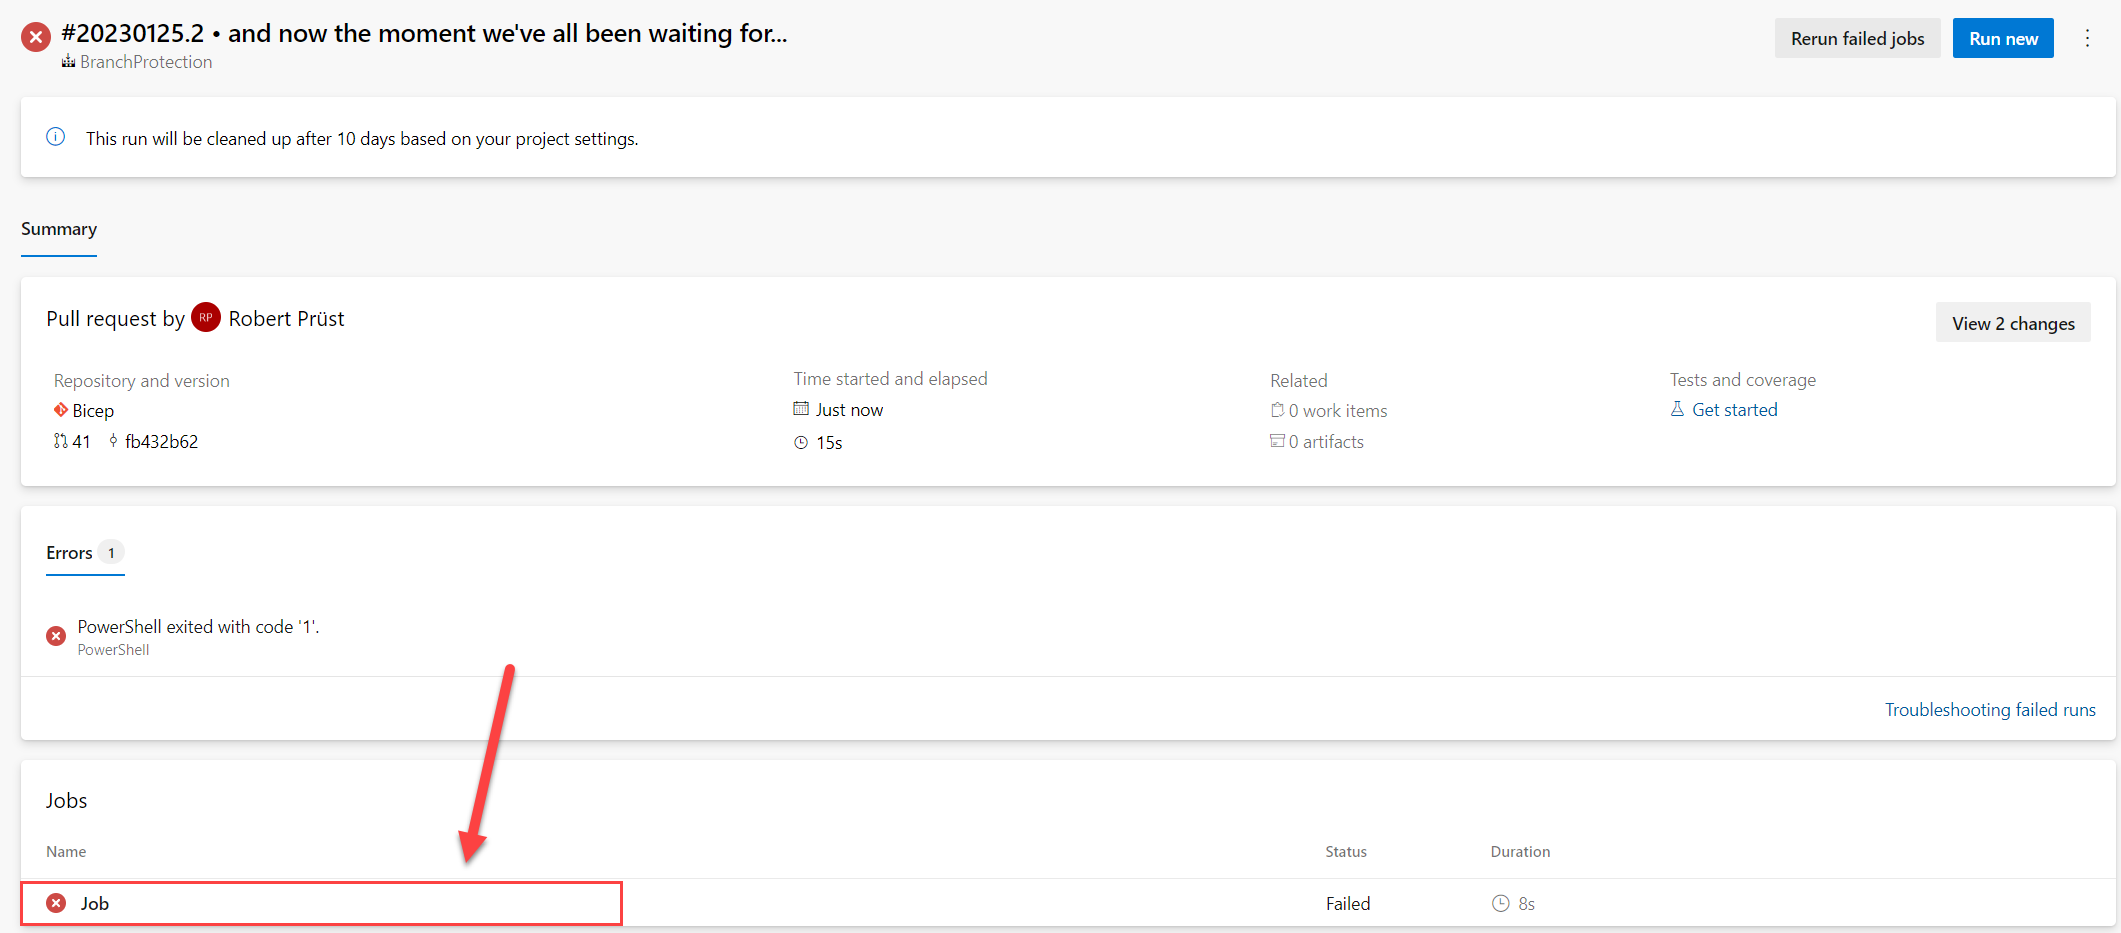
Click on the failed Build Pipeline

And now under Jobs select the job that has run that failed for more information
Under Jobs -> PowerShell, you can see exactly what went wrong:
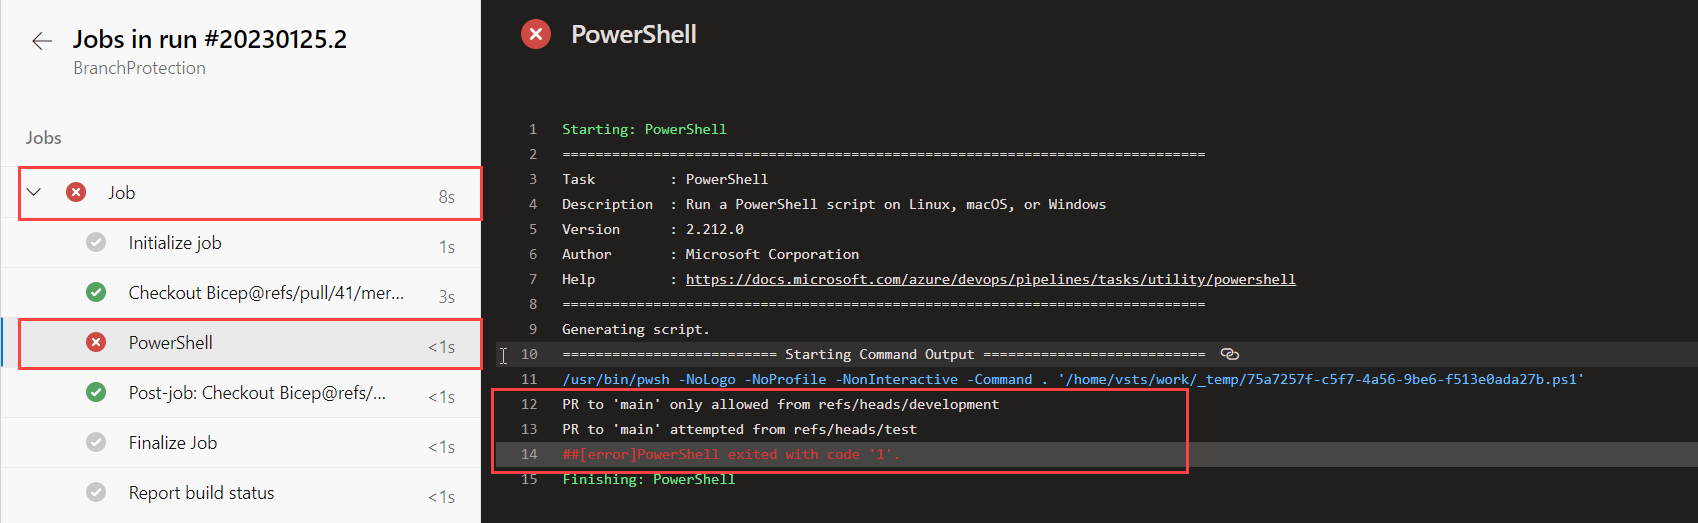
And there you have it, it’s not perfect, but it’s something… an easy way of preventing mistakes!
Happy coding! 😀