Set Up Windows 11 on a Hyper-V VM
By now you’ve most probably heard that contrary to popular belief, Windows 10 is not the end-all be-all Operating System by Microsoft.
Windows 11 has been announced to be the next version of Windows!
It is expected that by end of 2021 it should be ready to be shipped and we should be expecting new systems to come out with the latest OS from Redmond. If you’re like me, chances are you don’t want to wait so long to see what the buzz is all about and you just want to tinker and play with it and “test the wheels”.
So let’s get it started!
Pre-requisites
To get Windows 11 running on a VM, you’ll need to meet some pre-requisites. If you miss out on any one of these, chances are you can’t get it working. The optional requirement here is the choice of using Hyper-V as your hypervisor, but I’m using this one right now, so the rest of the post will be based on this.
Here’s the list of pre-requisites
- Hypervisor to run your VM on, like Hyper-V, VMWare ESX (either the player or full blown ESX), VirtualBox or whichever solution you prefer
- Your host device NEEDS to have a TPM v2.0 chip.
No chip, no luck… - A Microsoft Cloud account that is enrolled to the Windows Insider Program.
In case you don’t have it yet, don’t worry, they’ll let anyone sign up. - Minimum of 4GB RAM
- A VM with Windows 10 installed (as you’ll need to upgrade your current install)
Let’s get this party started
Ok, so you have your Windows 10 VM with minimum 4GB RAM created, let’s call it DEMO-VM.
First of all, make sure it’s in a stopped state, otherwise you won’t be able to make certain changes in the Settings.
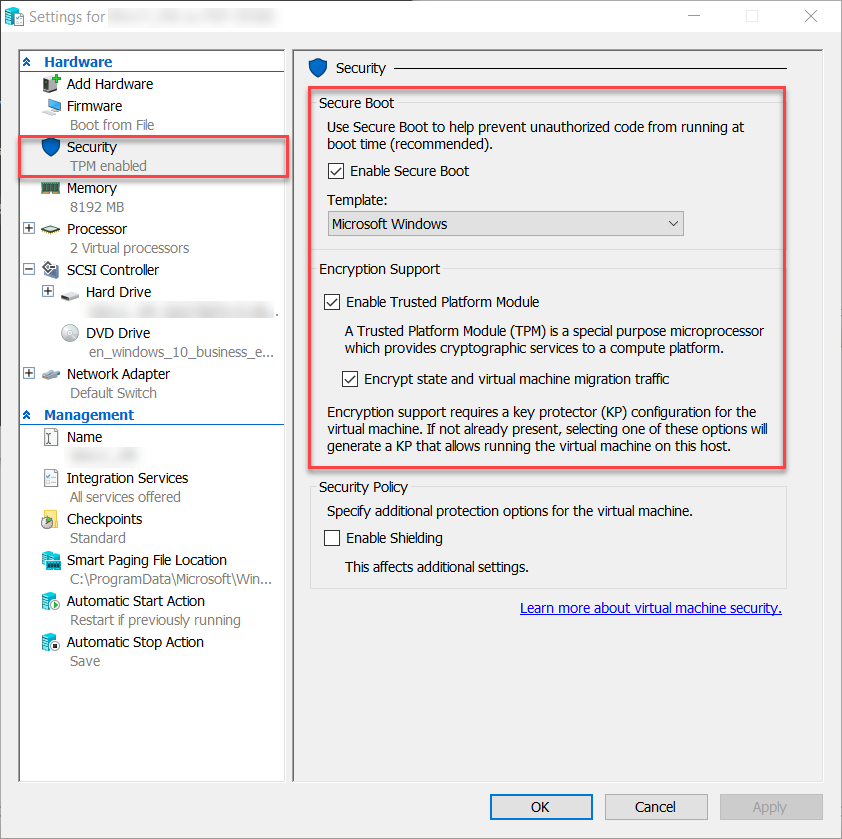
Go to Settings and go to the Security tab and enable both Secure Boot and Encryption Support (TPM).
Start your VM up and let it boot into Windows 10.
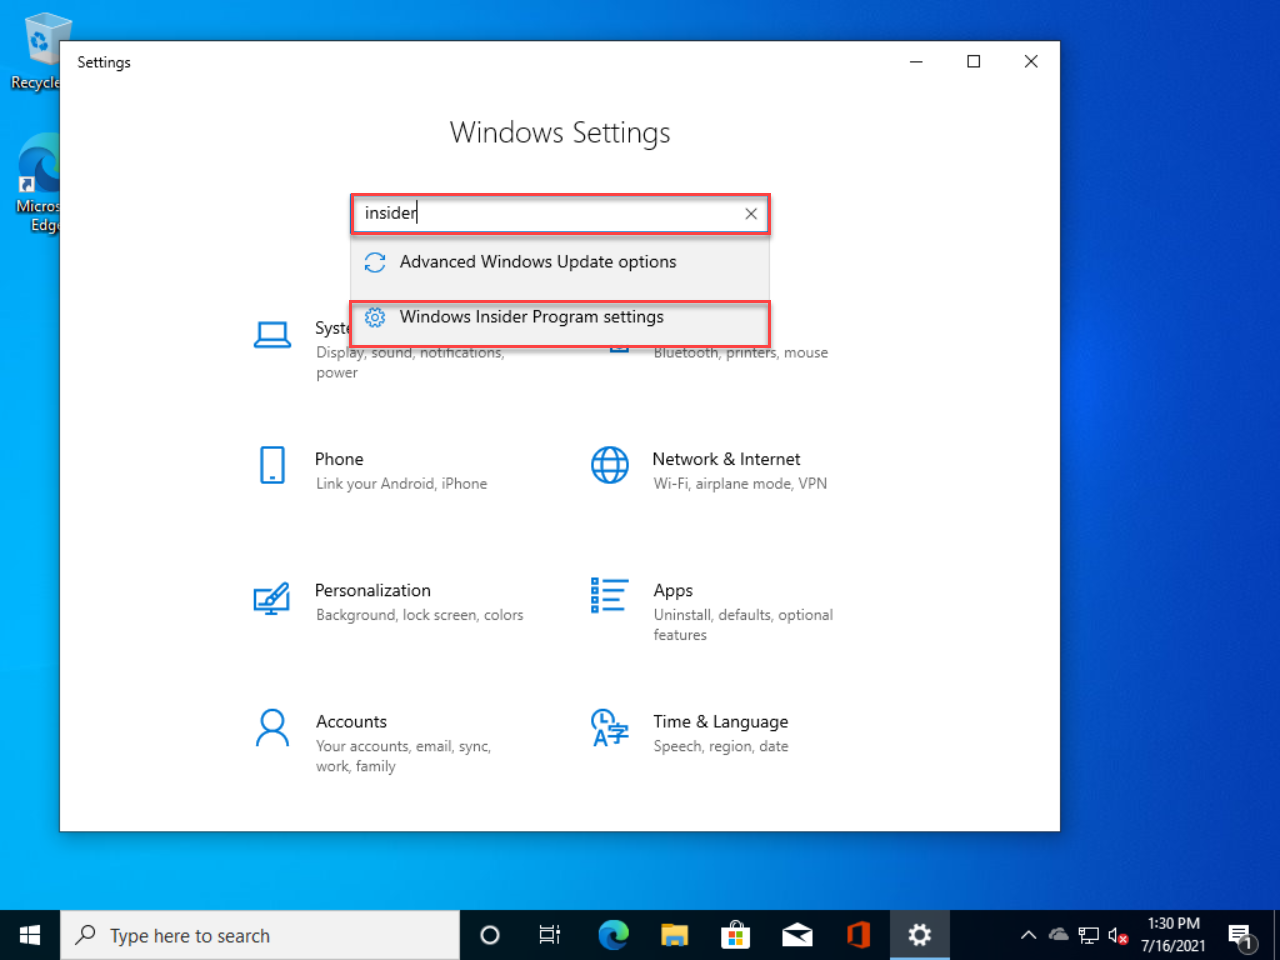
Once there, open up Start -> Settings and do a search for Insider.
It should come up with Advanced Windows Update options and Windows Insider Program settings.
Select the latter to continue.
Chances are that once you’ve arrived at the Windows Insider Program page, you’ll be greeted with this message:
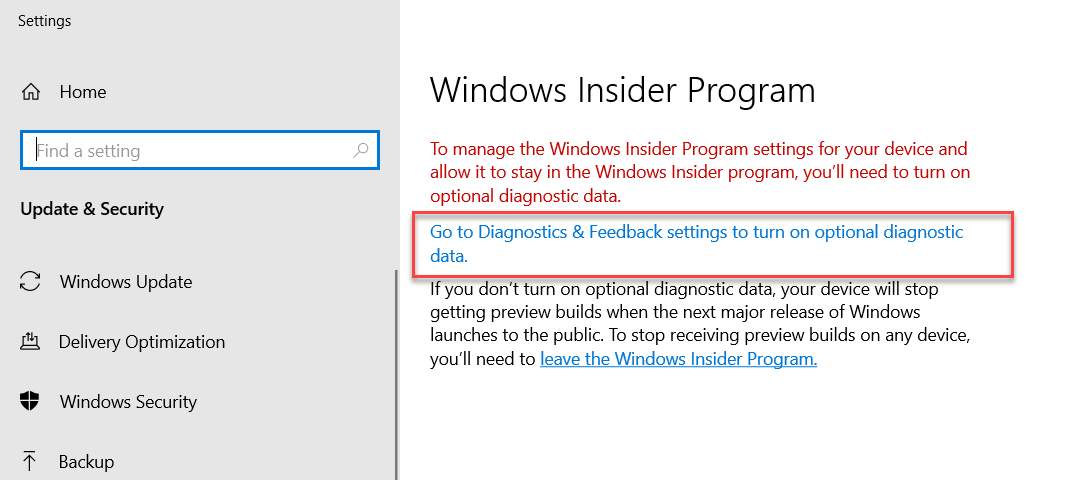
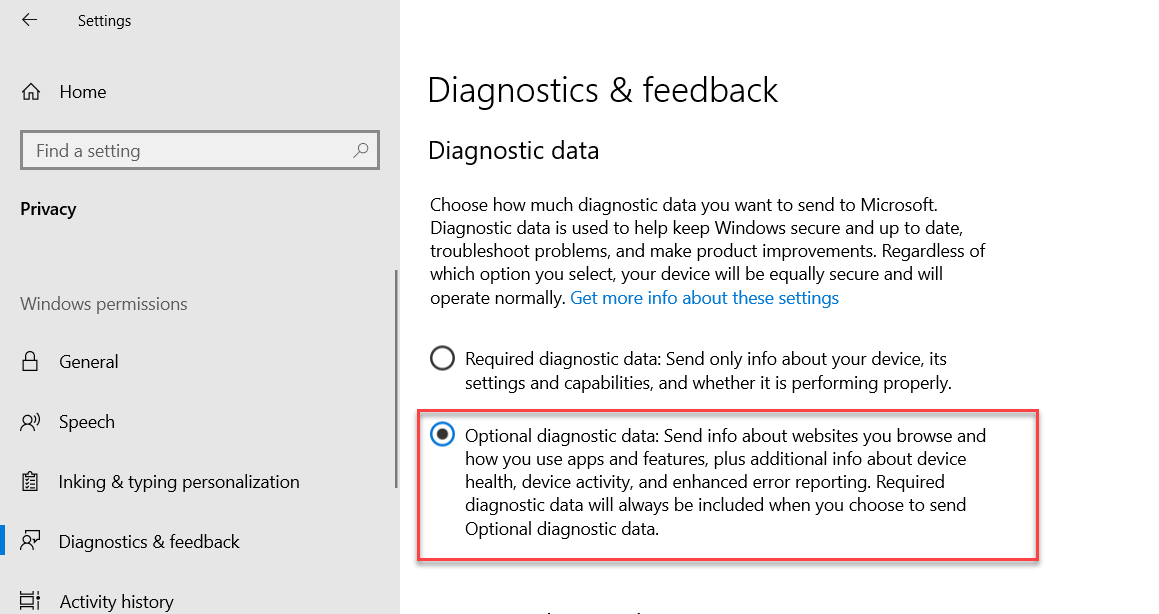
Just follow the link on the page and set the box to Optional diagnostic data
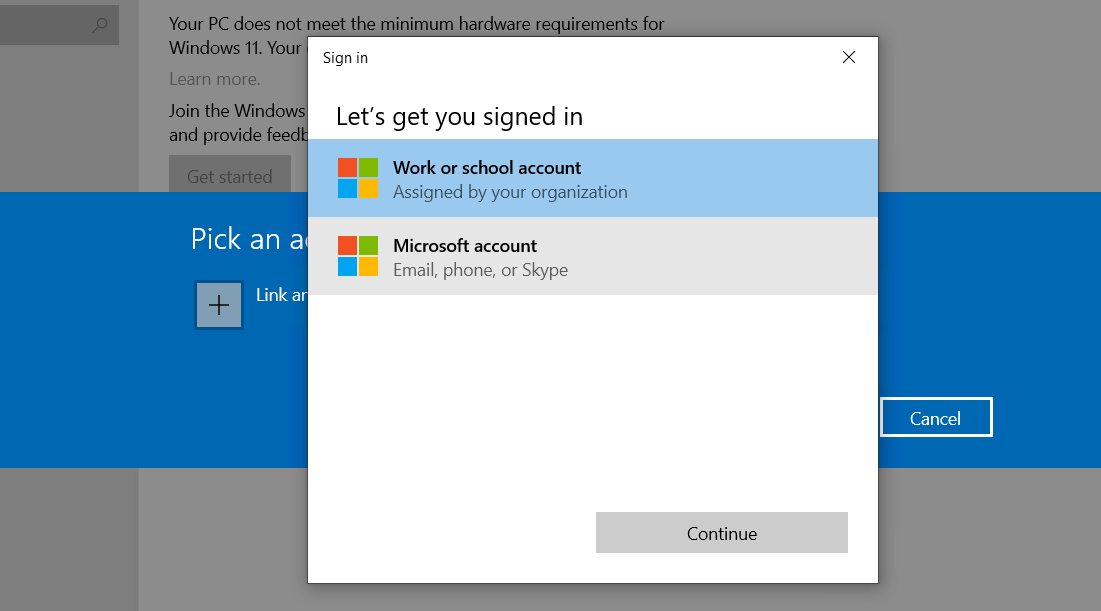
Head back to the Windows Insider Program page and it’s time to configure your account
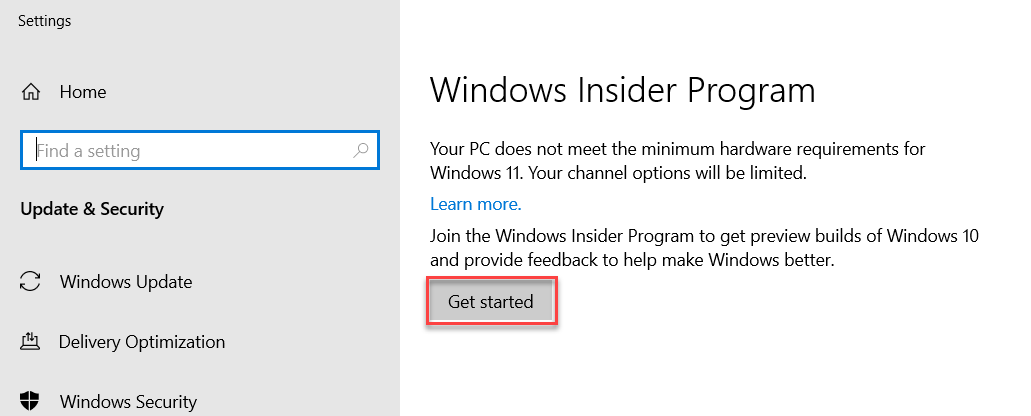
Select the account you want to have linked that has access to the Windows Insider Program
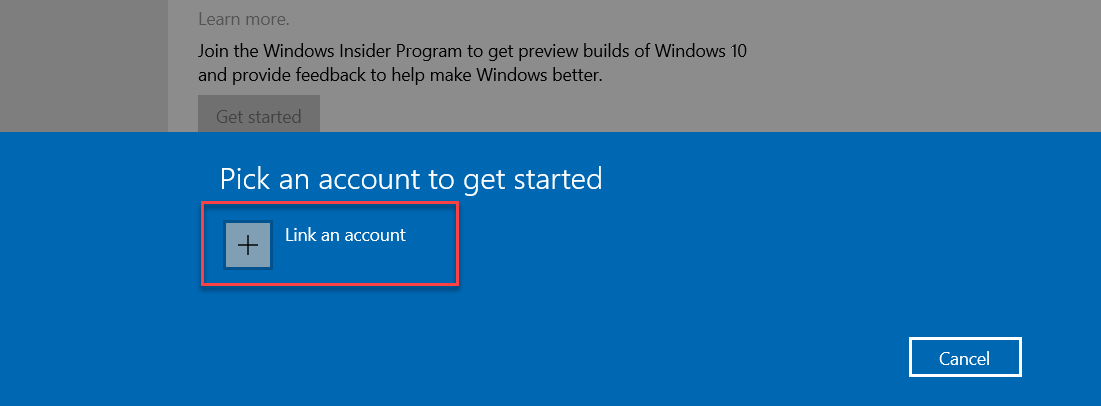
and log in
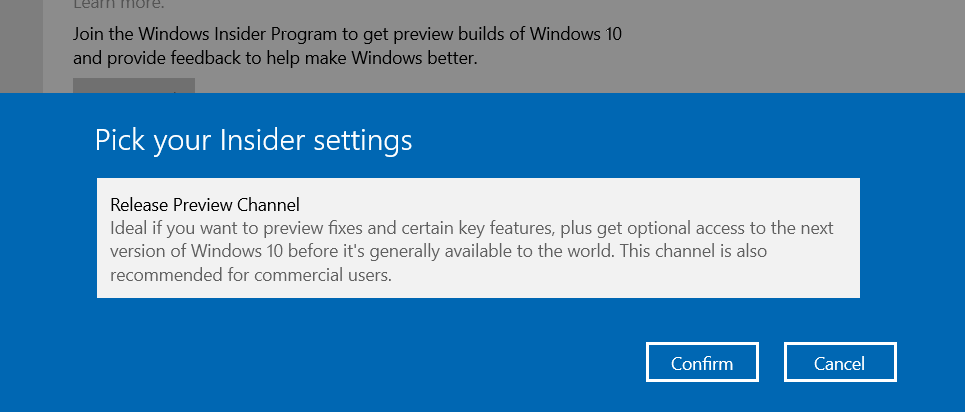
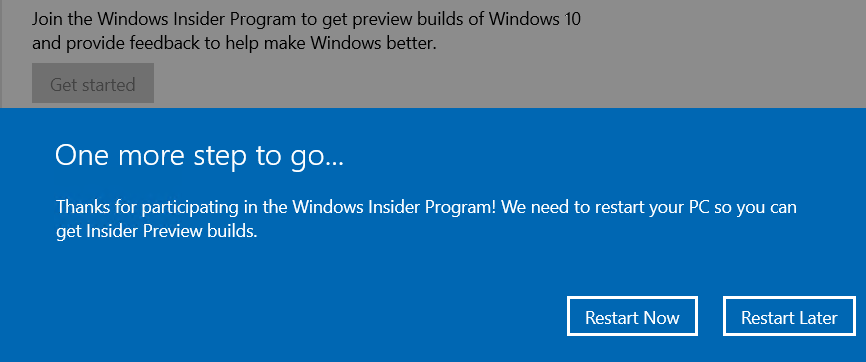
Now comes the important part… Setting the Insider settings so you have access to Windows 11!
In case you only have the option to select the Release Preview Channel for Windows 10:
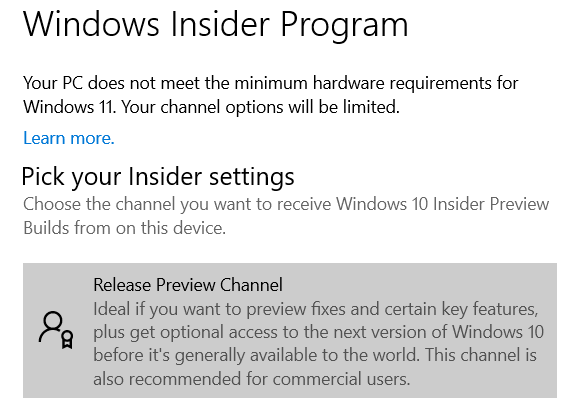
If this is the case, shut down your VM and make the appropriate changes to the configuration.
If you’ve done everything as planned, you should be greeted with the following options:

Select the Dev Channel and confirm your choice
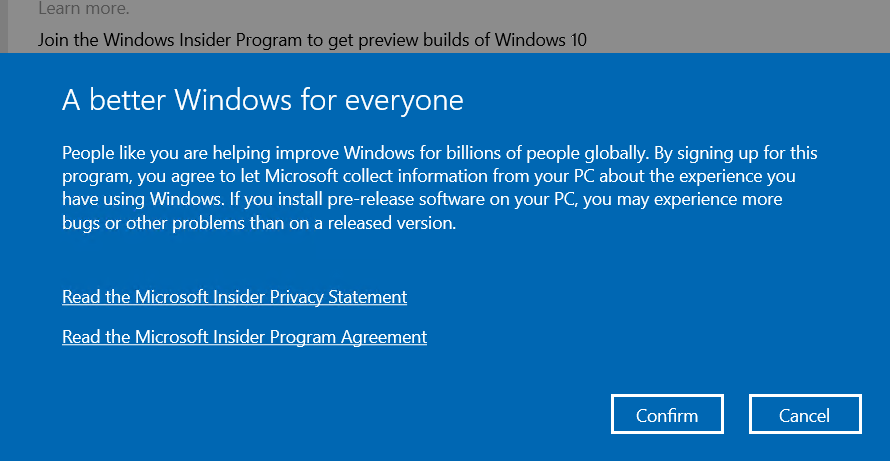
And restart your machine!
Once your machine is back up, just head over to Windows Updates and check for new updates
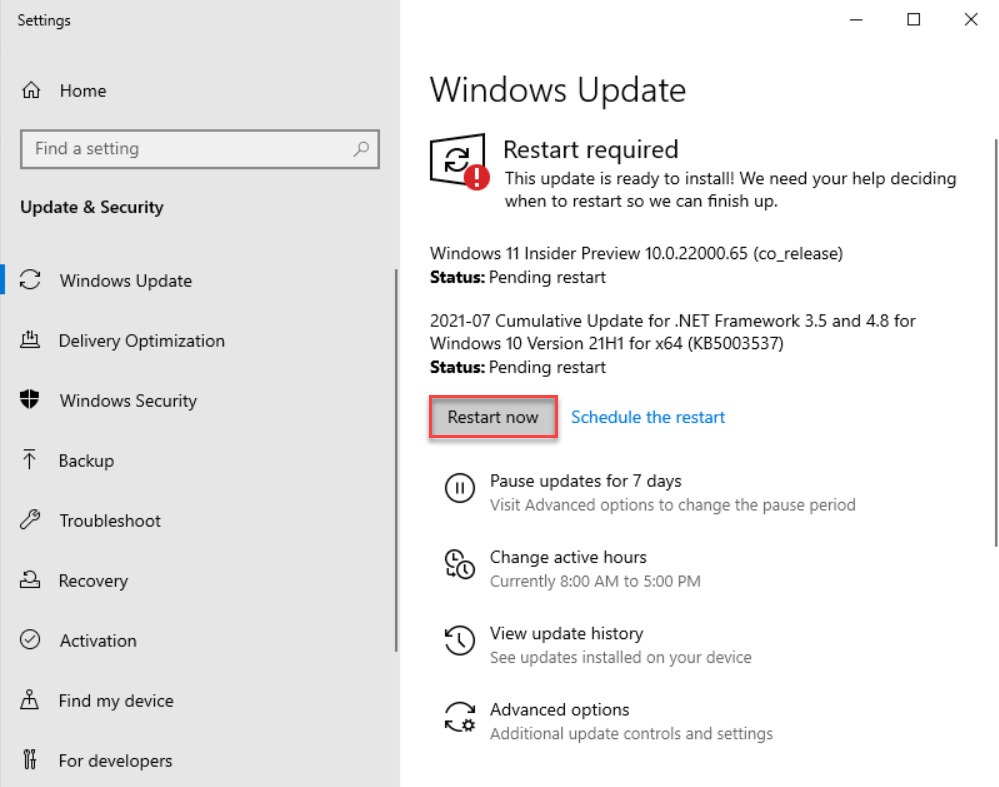
Result!
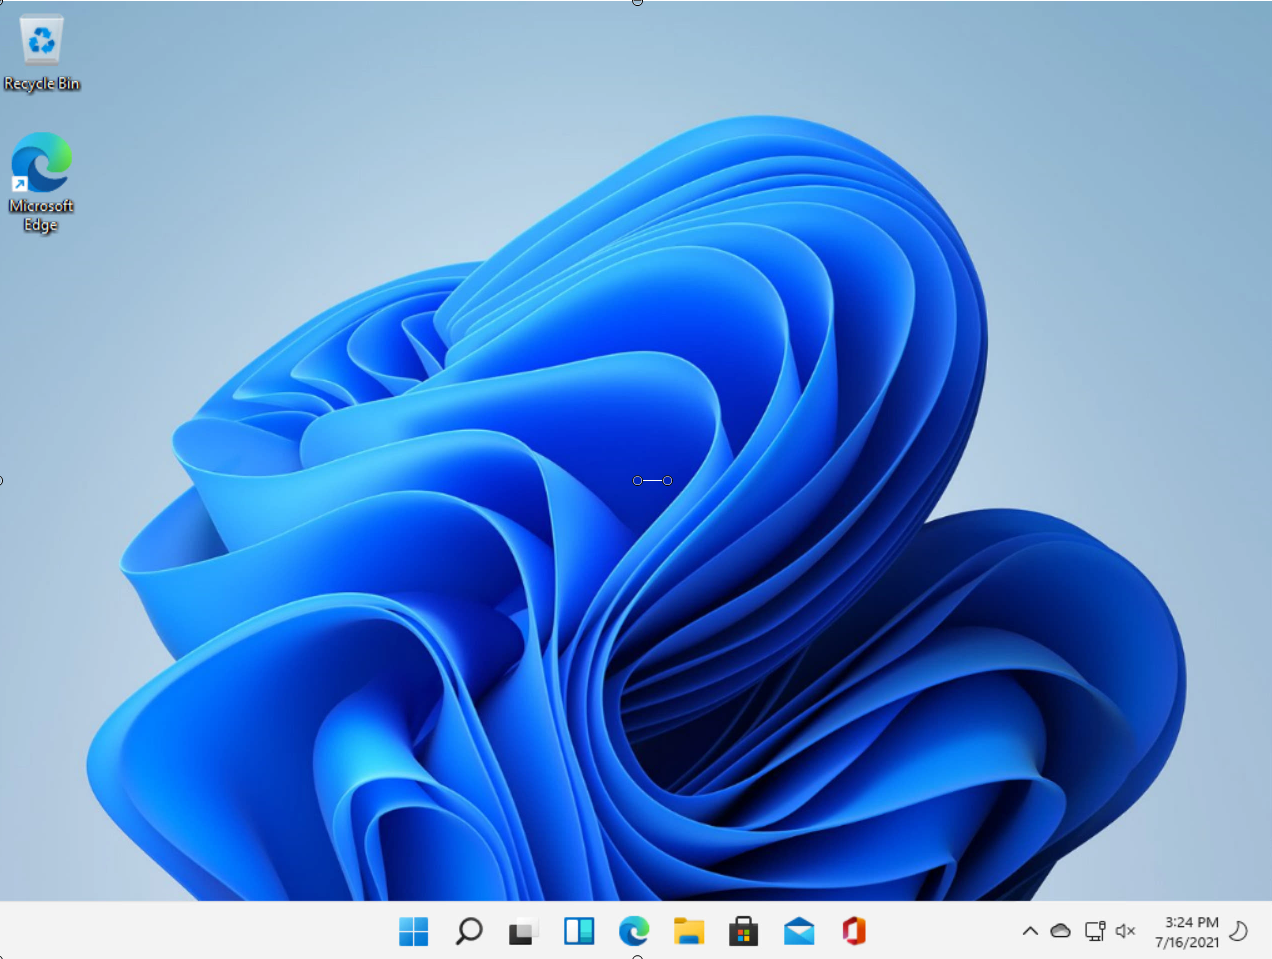
Install the update as normal and restart your machine to see the magic happen :smile:
Tip
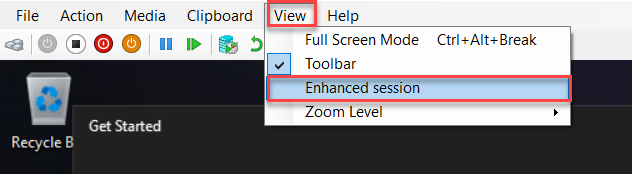
I’ve noticed that sometimes when you’re using Hyper-V with your new Windows 11 machine, it has troubles connecting to your VM.
If this is the case, please make sure that you have deselected the option Enhanced Session on your connection.