Connecting Azure DevOps to Another Azure Subscription

I just wanted to use this blog post to document a frequently asked question concerning Azure DevOps:
What do I need to do to let my Release pipeline deploy to a tenant/subscription to which my Azure DevOps account has no access?
To put it in Microsoft terms:
You have an Azure DevOps account called John.Smith@contoso.com in the Contoso organization, but you want to deploy resources to the Azure subscription for tailspintoys.com.
Your Contoso account does not have direct access to the tailspintoys.com subscription, but you can have tasks done on the subscription by another Global Administrator if required.
What do you do?
The answer here is:
You need to have the Global Administrator in the tailspintoys.com subscription create a Service Principal account, give it the correct role and access on the desired resource location and then you need to manually create a Service Connection in your Contoso Azure DevOps environment.
Well, that’s all fine and dandy, but what are the exact steps required here?
This is what this post will try and show you :smiley:
Steps required for the Global Administrator of Tailspintoys.com
- Open the Azure portal in your favourite browser
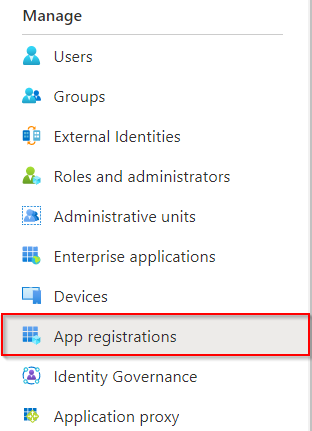
- Open the Azure Active Directory Blade
- Open the App Registration Blade
Open the App Registration blade - Create a new App Registration, dedicated for your Project’s connection.
- Enter a descriptive name for the account
- Select the option
Acccounts in this Organization Only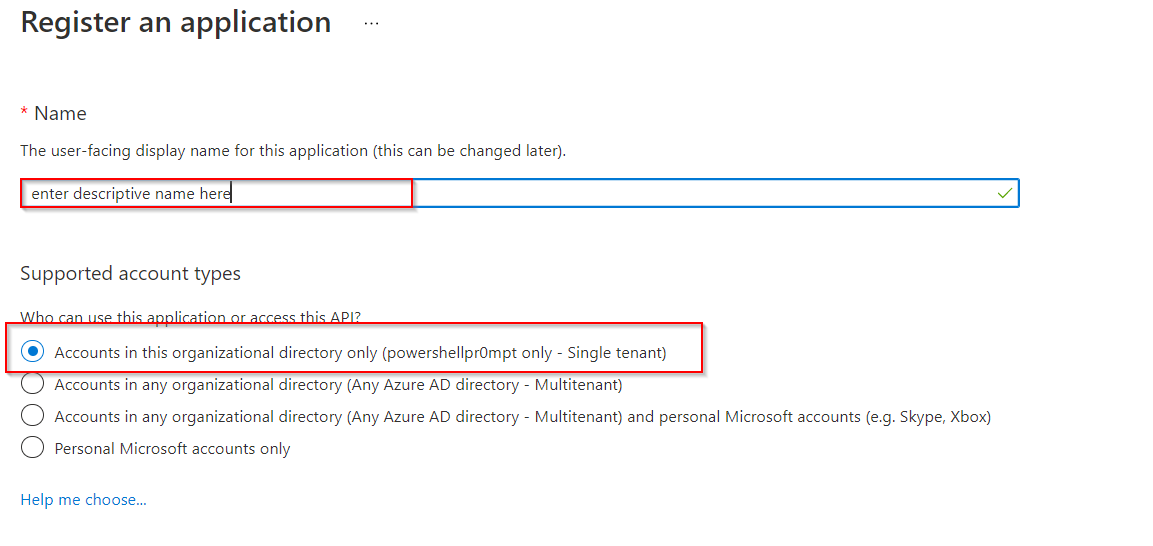
Create a new App Registration
- Open the newly created Registered App and go to
Certificates & Secrets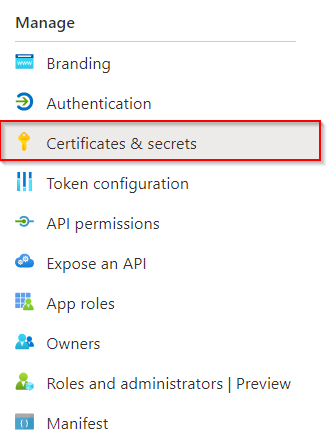
Go to Certificates & Secrets - Create a new Secret for the Registered App
DO NOTE!! Directly copy the Secret value as this is the only time you’ll be able to see it.
Once you leave or refresh the page, the value will no longer be displayed and a new secret will have to be created in case you didn’t note it down or forgot it.
Create a new Secret - In the Azure Portal, navigate to the location to which the newly created Registered App needs to get permissions to do operate.
Possible options are either a Resource Group or Subscription - Open the
Access Control (IAM)Blade on either the Resource Group or Subscription you want to provide access to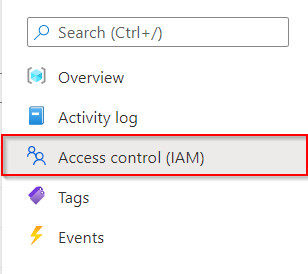
Open the Access Control (IAM) blade - Click
Add->Role Assignmentto add the Registered App and give it the appropriate permissions role (of course using the principle of least priviledge)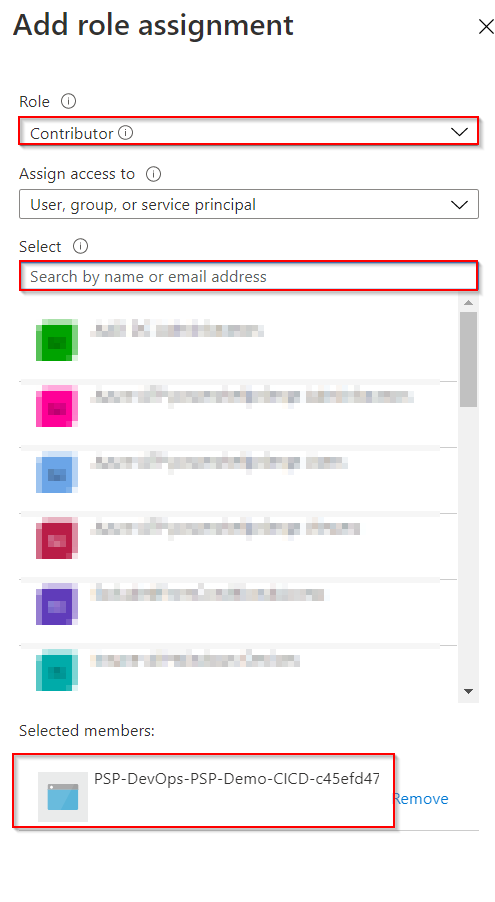
Search the Registered App and add the desired Role
Steps required for you in your Contoso Azure DevOps project
- Open your Azure DevOps project in your favourite browser
- Open Project Settings
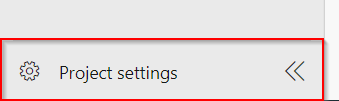
Open Project Settings - Select
Service Connectionsunder thePipelinessegment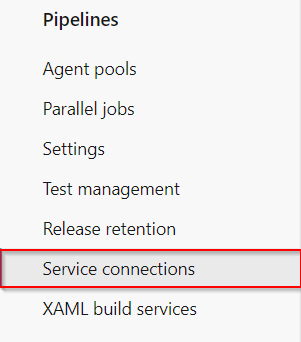
Service Connections - Click
New Service Connection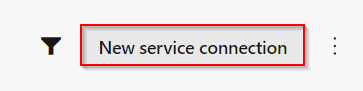
Click New Service Connection - Select
Azure Resource Managerand clickNext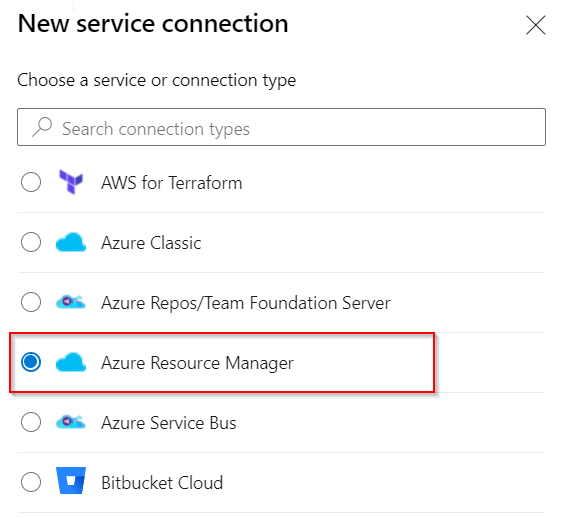
Select Azure Resource Manager - Select
Service Principal (manual)and clickNext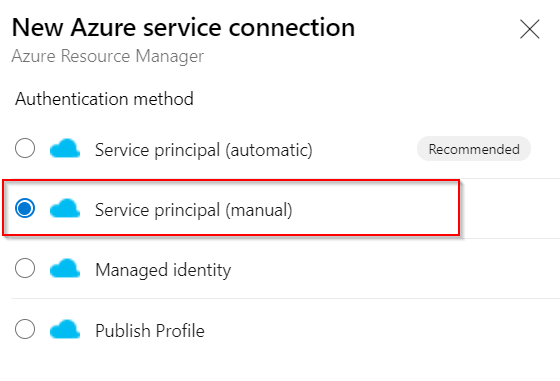
Select Service Principal (manual) - Enter the required information
- Subscription ID - You can get this from the Azure Portal -> Subscriptions blade
- Subscription Name - Enter a name to recognize the Subscription by
- Service Principal ID - Client ID for the newly created Registered App (you can find this information under the Registered App’s Overview blade as
Application (client) ID) - Service Principal Key - The created Secret for your Registered App
- Tenant ID - The Tenant ID of the Registered App (you can find this information under the Registered App’s Overview blade as
Directory (tenant) ID)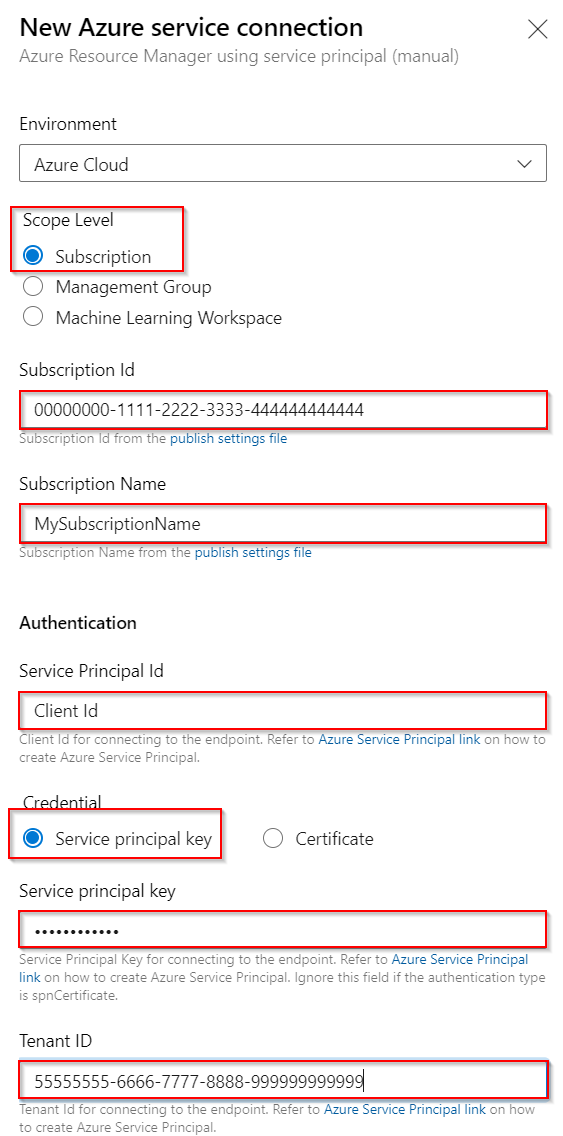
Enter the required information
- Use the
Verifybutton to confirm that the details have been entered and configured correctly
Verify - Enter the Details
- Service Connection Name - The Service Connection Name you want to use in Azure DevOps so you know which connection you’re using
- Description - Enter the description of the newly created Service Connection. Suggested is to add the scope and permissions used on the Registered App
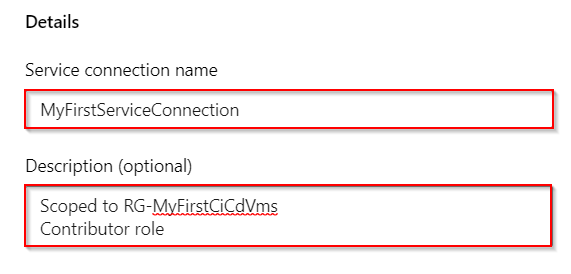
Enter the Details
- Click
Verify and Save
And that should be all that’s required!
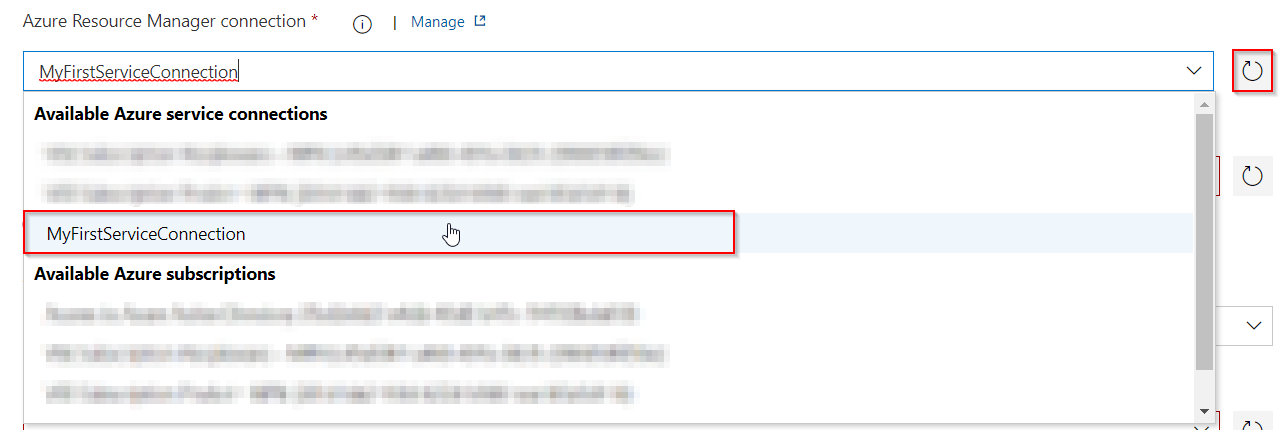
Head on over to your Azure DevOps Release pipeline, select the Stage you want to set your deployment on and be sure to Refresh the Azure Resource Manager Connection field.
Once that’s done, select your newly created Service Connection and away you go! :thumbsup: