Using Pester for Infrastructure testing
Recently the company I am working at was running into performance issues which became a pain to sort out as it was so sporadic (lasted like 5 mins max every time), but when it happened it affected the entire company.
I was asked to assist in troubleshooting and finding out exactly what was causing this within the short time frame available.
Narrowing down troubleshooting
First we had to look into what kind of issues we ran into and we quickly had a suspicion that this was caused by our Anti-Virus software throwing fits. But how to prove this…
Seeing that we run a VMWare based shop with Citrix VDIs and mostly Windows Servers , PowerShell is of course my go-to tool. However, firstly I’ll try and see if I can find things in for instance performance graphs/metrics during the aforementioned time frames when people reported the issues.
This narrowed it down for us to the following questions:
- Front end: what’s the performance of our AV scan servers for VDIs [we use host based scanning instead of agents on our clients]?
- Front end: what’s the performance of our VMWare hosts for the VDIs?
- Back end: what’s the performance of our AV scan servers for Servers?
- Back end: what’s the performance of our VMWare hosts for the Servers?
- Back end: what’s the performance of our Citrix farm’s VMs?
- Back end: what’s the performance of our RES (now IVANTI) infrastructure VMs?
We had been able to exclude our storage system, which for me was fine as the PowerShell integration for our storage is subpar at the moment.
Can I get the information I need?
Playing around with PowerShell, I quickly noticed that all information needed was obtainable, albeit through various cmdlets.
Instead I created 2 functions that are able to get all the required information for the 2 different types of configurations (thanks to LucD’s great posts about PowerCLI and obtaining performance statistics):
- VMWare Host information - Get-VMInfo
- Virtual Machine information - Get-VMHostInfo
I’ve also added a small helper function in order for me to easily connect to vCenter servers (in production I have used a ValidateSet attribute to easily switch between my available vCenter servers, as well as using saved credentials in CliXML format to speed things up).
But now what?
In comes Pester…
In case you haven’t used Pester yet, it’s awesome!
According to the creators of Pester, this is what it does:
Pester is the ubiquitous test and mock framework for PowerShell.
It provides a means for you to make tests for your code, making sure it does exactly what you need/want it to do, or tell you if it doesn’t! At least, that’s what it was made out to be. For a while now, people have started using Pester for infrastructure testing, to simple see if an environment is behaving as it should!
Now this post won’t get into the nitty gritty of “What’s the Pester syntax” or “Why have you used X instead of Y”, perhaps I’ll do another post on that later, it’s just to show you the possibilities and power of PowerShell when combined with something like Pester.
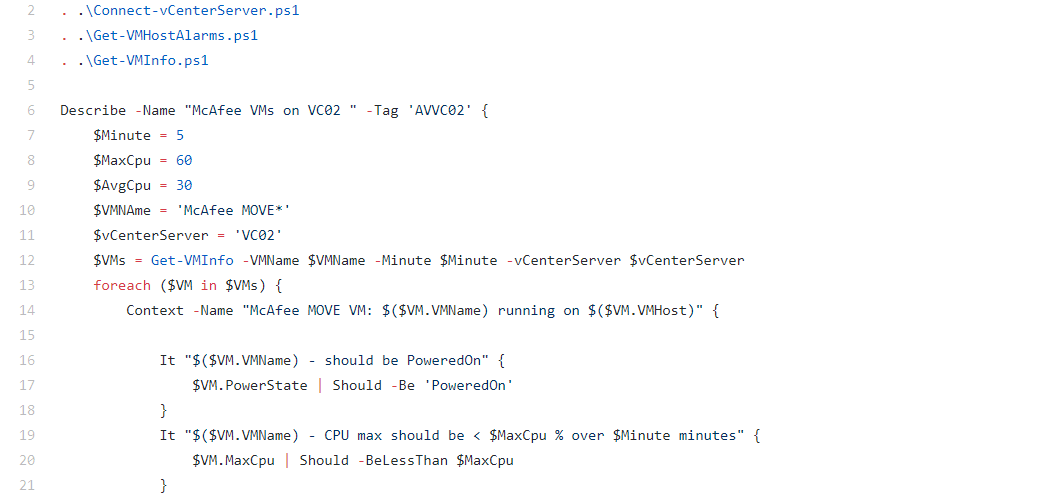
For example, I’ve simply used PowerShell looping techniques within Pester to loop through all the found VMs, get all of their disks and check each and every one of them if they meet the set requirements.
foreach ($disk in $VM.Disks) {
  $DiskFree = [math]::round((($disk.FreeSpaceGB / $disk.CapacityGB) * 100), 2)
  It "$($VM.VMName) - $($Disk.Path) should have > $MinDiskFree % available" {
    $DiskFree | Should -BeGreaterOrEqual $MinDiskFree
  }
}
The power of Pester lies it’s simplicity and readability [quite similar to PowerShell itself], as well as the fact that it can harness all of the other capabilities PowerShell has.
By your powers combined…
So what we have is PowerShell functions that can obtain performance information from both VMs and VM Hosts, combined with Pester tests that check if the desired systems meet required performance needs.
And it goes a little something like this:
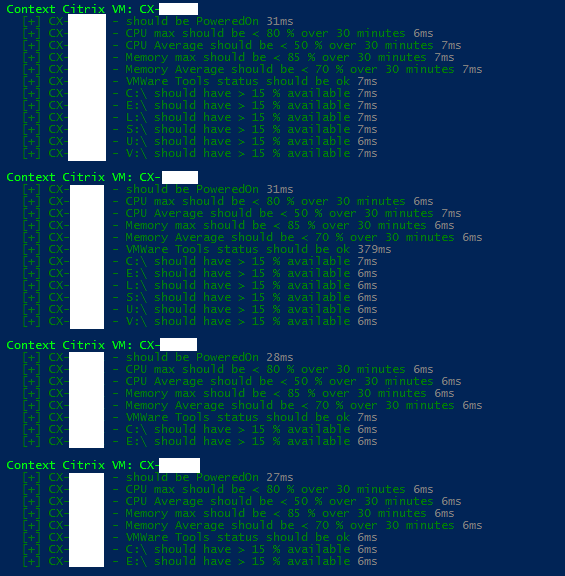
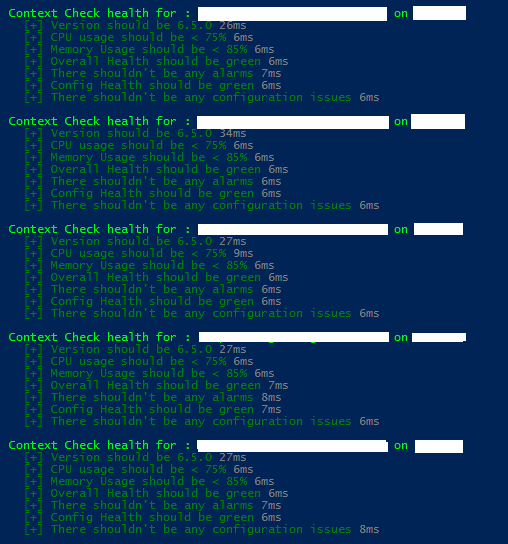
In total this runs approximately 450 tests in just a few seconds, depending on if I used saved credentials or if I have to manually provide them [then it takes approximately 60 seconds, give or take]
Here’s a link to the actual Pester test along with the other scripts in the same folder [required due to dot sourcing] for you to try out/look into.
Be sure to of course check and correct the machine names to look for, but you can start the Pester test by running
Invoke-Pester -Script .\VDI_Infrastructure.test.ps1And the final verdict is:
For the people interested in the results:
It turned out our McAfee Anti-Virus solution had had an update and all of a sudden had stopped implementing our exclusions on all levels [Front end as well as Back end]. The test showed high CPU spikes on the AV machines at times of the reports and we were able to create a ticket in order to get it resolved.
The speed at which I was able to run and reproduce these tests meant we had ample sources of information for McAfee to use to resolve this matter and for me to prove to my colleagues they should finally make an effort into learning PowerShell!
I hope to have time soon to make some more Pester based blogs, perhaps I’ll be able to dive more into syntax examples for those of you that still have questions, but hopefully this shows a fun and exiting way to increase your usage of PowerShell in your environment!
Happy Scripting! 🙂